

Everyday Strongman (woman)

There has been a recent increase in the popularity of “strongman” style exercises and workouts in the underground fitness community as of late, but they still remain the domain of the large and in charge – used predominately by high-level athletes and experienced lifters. You don’t have to be World’s Strongest Man (or Woman) to use these movements, though. The truth is, used in conjunction with foundational movements (squats, presses, and deadlifts), these “strongman” style movements are highly functional in their application, as well as being both fun and challenging for all levels. Furthermore, the related tools are fairly inexpensive and accessible – rocks, tractor tires, dumbbells and homemade fat grip barbells can do the trick just fine. We regularly use strongman exercises as maximum effort lifts, as well as part of GPP (General Physical Preparedness) workouts.
Here are some moves you can implement without too much work, set up or cost.
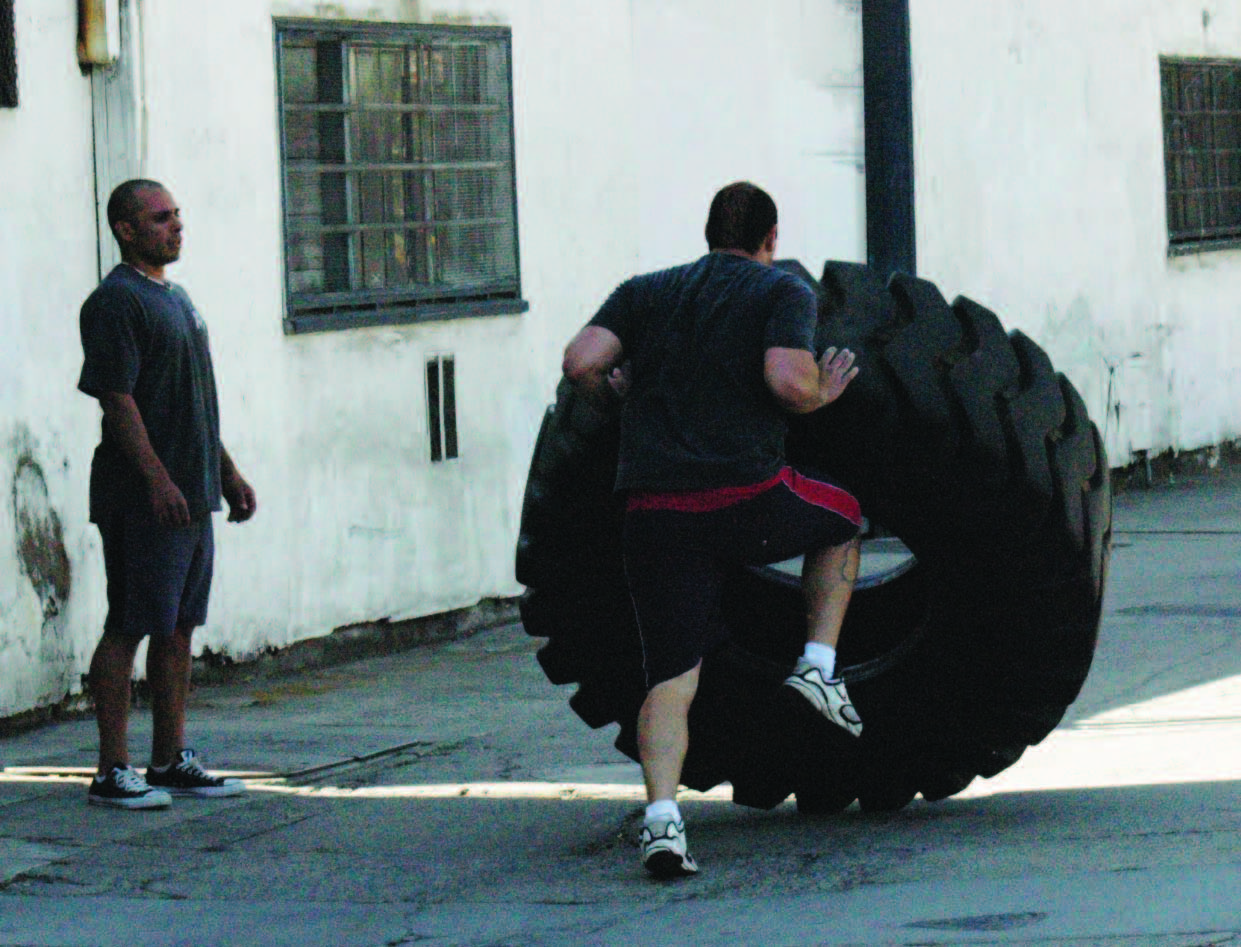
Tractor tire flips
These are so common now that you can see tires in “mainstream” gyms. If you’ve access to a truck, these are easy and cheap (read: free) to obtain. Stop by your local tire shop and they’ll have stacks and stacks in the back that they’ll be glad to get rid of.
As a general rule, you’ll be able to flip a tire about 150-200lbs heavier than your 1RM deadlift, so look for something in that range. When looking for a tire, consider its secondary uses, such as jump-ups and sledge hammer hits. The diameter and depth of the tire can have an impact on these usages, as well as the difficulty of actually flipping the tire. The amount of tread on the tire can also affect its ease of use – certain tires can sit almost flush to the ground, making them difficult or nearly impossible to flip. Look for a tire with deeper tread – something that you can easily get your hands under when it is sitting flat.
Although athletes should be well versed in the traditional deadlift before they attempt tire flips, it does require a slightly different technique. Set up in an angled position (about 45Ëš), arms flush against the side of the tire (chin and chest may be in contact with the tire, depending on its height), hands set roughly shoulder width apart under the tire and elbows locked. Drive into the tire, pushing forward as you lift. You may need to wedge your knee under the tire to support it as you flip, depending on the weight of the tire. Once you reach full hip extension, switch your grip into a press position and push the tire over.
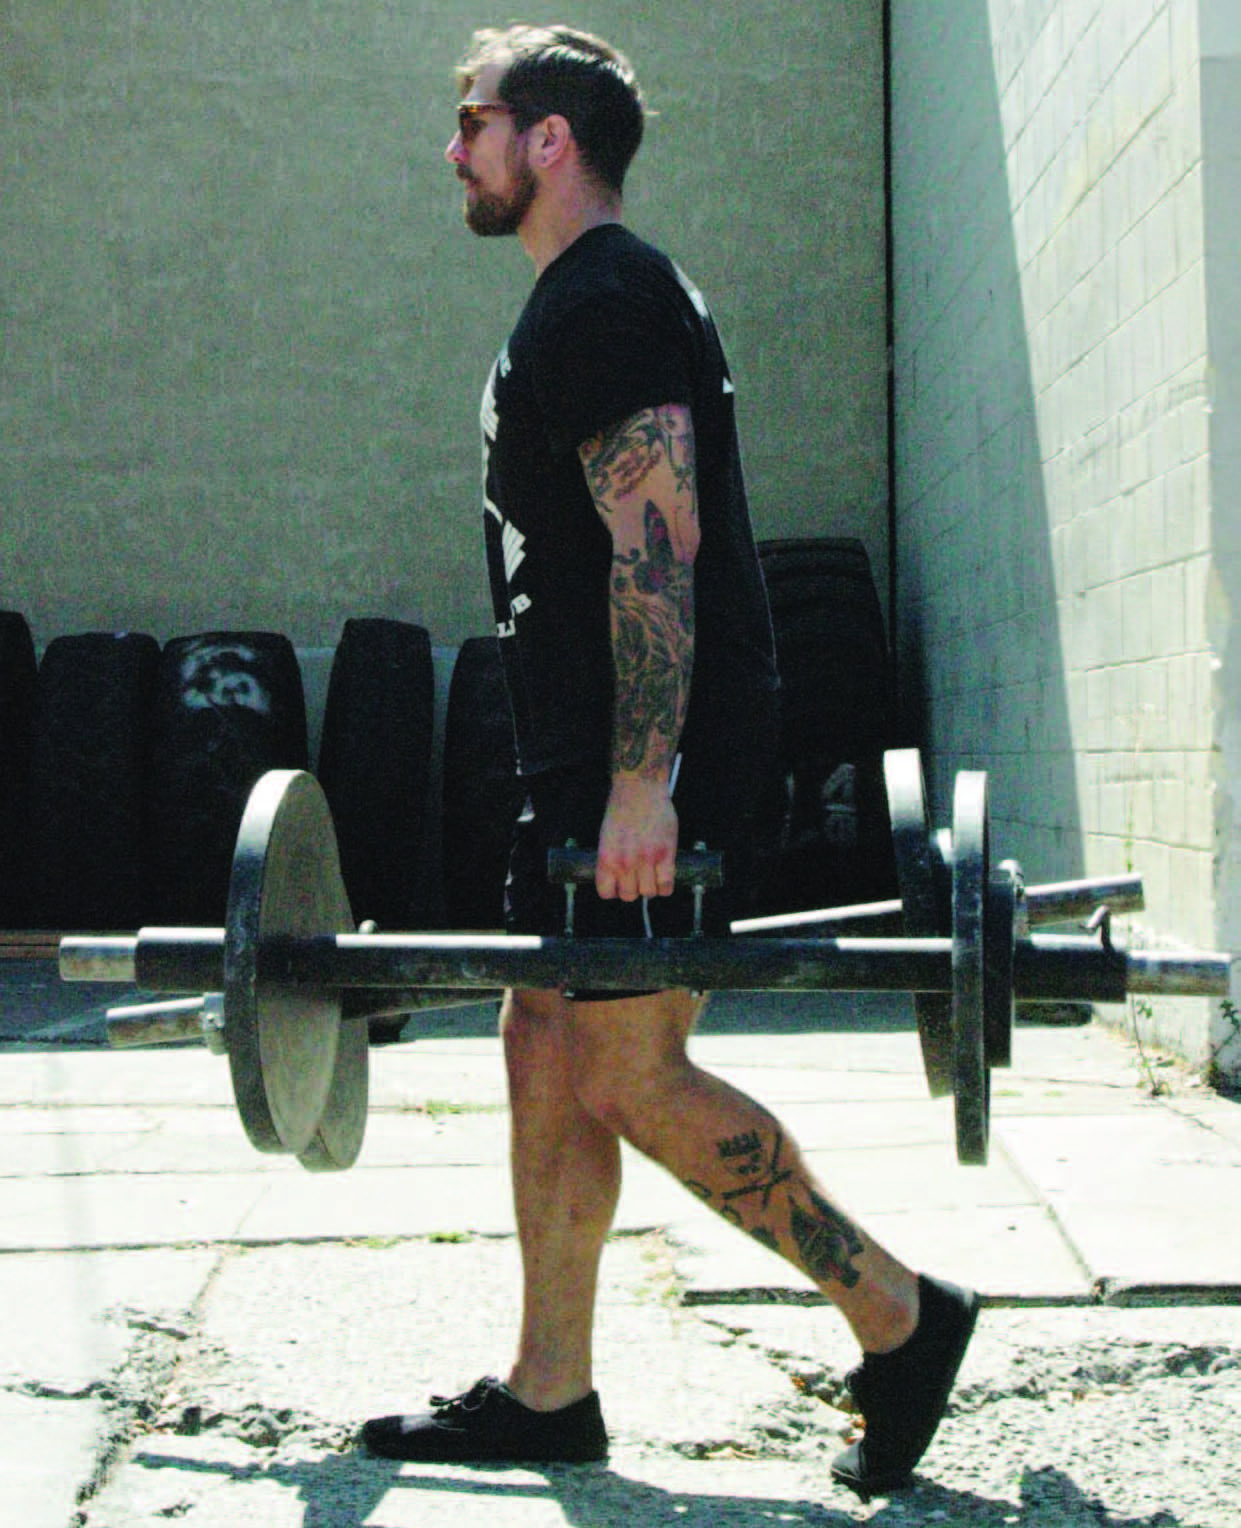
Farmer’s Walk
This is a valuable movement for the development of spinal strength, postural reinforcement and grip strength. It doesn’t take much to build a set of solid, Olympic plate-sized handles, but kettlebells, dumbbells or even barbells can do the trick just fine.
Most athletes will be able to carry a much heavier weight than they expect. As with the tire flip, begin with a solid foundation in the deadlift/posterior chain movements, and only add in the farmer’s walk when the athlete has sufficient spinal awareness to lift the weight safely. The amount of weight should be challenging (something the athlete can deadlift from the “suitcase” stance for only a few reps).
Once the weight is off the ground, the athlete should assume solid, upright posture with scapula retracted, arms straight at sides and eyes forward. A common postural distortion here is excessive forward thrust of the head – a position created by too much anterior shoulder rotation. Correct by pulling the shoulders back and down and controlling the weight, resisting the impulse to allow momentum to carry the weight forward. This can be done for distance or time, but remember: turning around is significantly more difficult than forward movement. Try to find a long, straight pathway that does not require much deviation in the path of travel or many turnarounds.
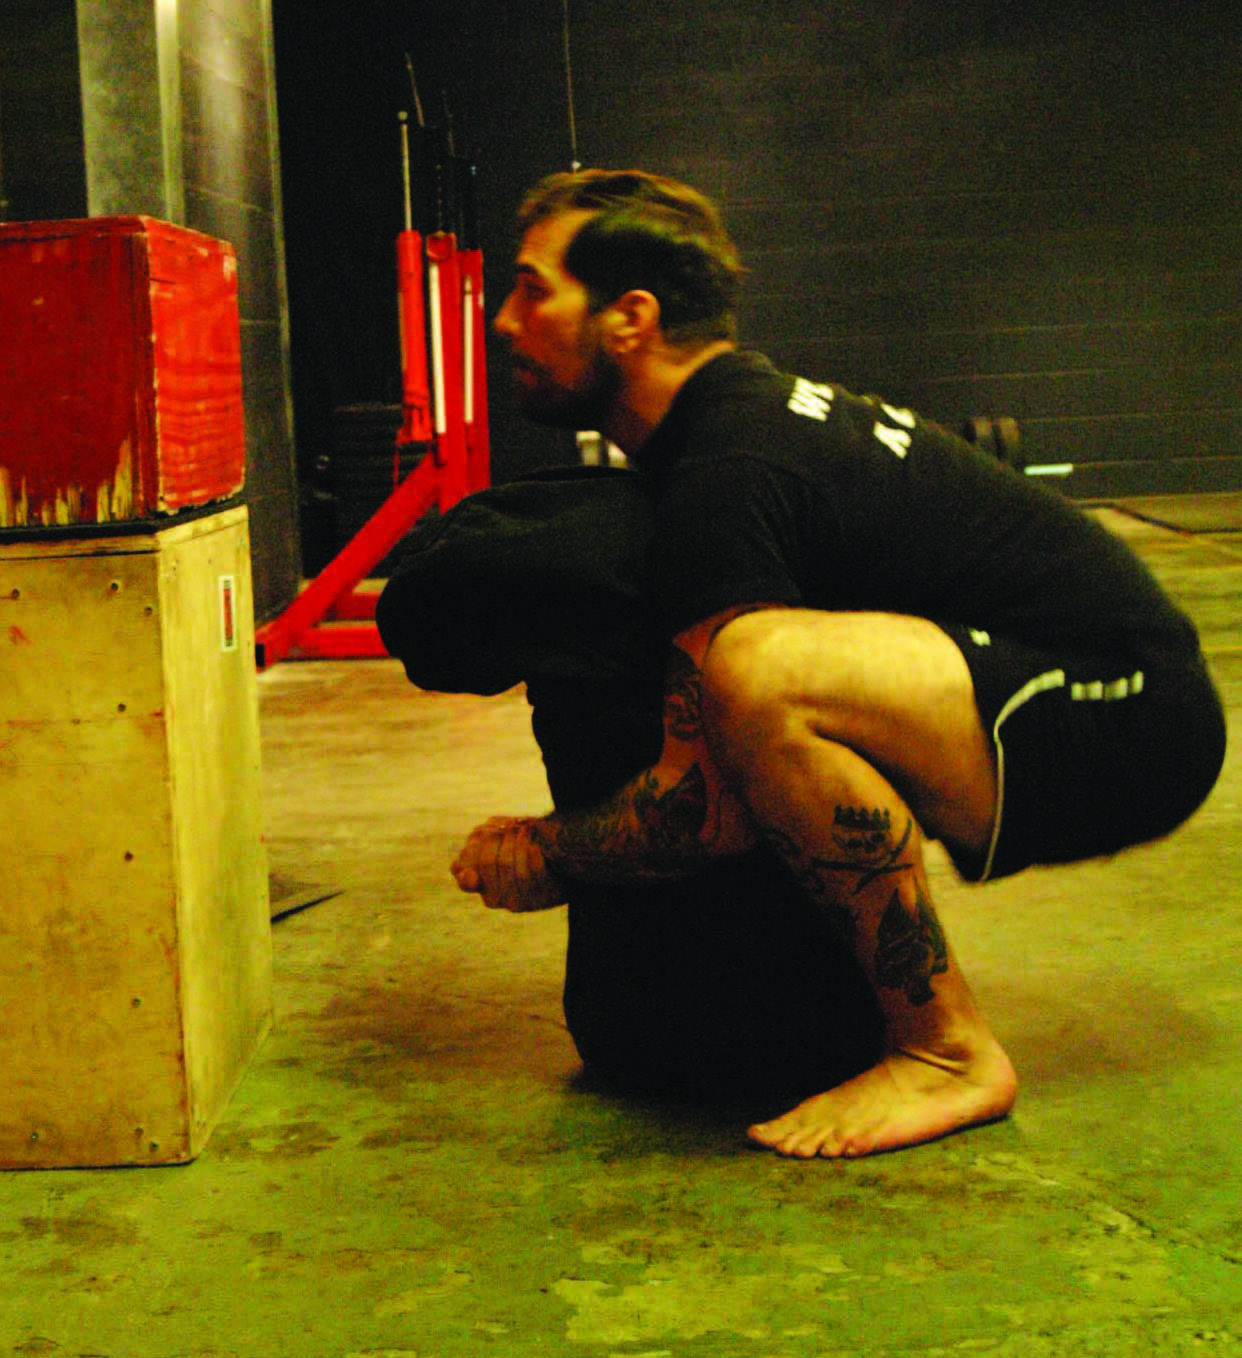
Stone lift/carry
This is one of my favorite movements, though most stones you’ll find are in the 300-500lb range, and therefore usually left to high-level strongmen. With the rise in strongman-style training, there are actually a wide variety of stone sizes available, and molds for weights as light as 80lbs. Any stone can work, however, though I would recommend finding something smooth and fairly uniform in size/thickness/etc. If a suitable stone cannot be found (or if you simply do not want a stone in your facility), a heavy sandbag will do just fine.
The introductory move will be a simple lift: begin with the stone/bag between your feet, assume a low squat position, grip far side of the object and lift. Most competitive strongmen utilize a hips-first, rounded-back lift style, but this should only be done with proper training and posterior chain strength. Athletes can use the stone lift for max weight single lifts, or reps for time (amongst other options). The object can be loaded on to a platform (the higher, the harder), shouldered, or lifted and carried.
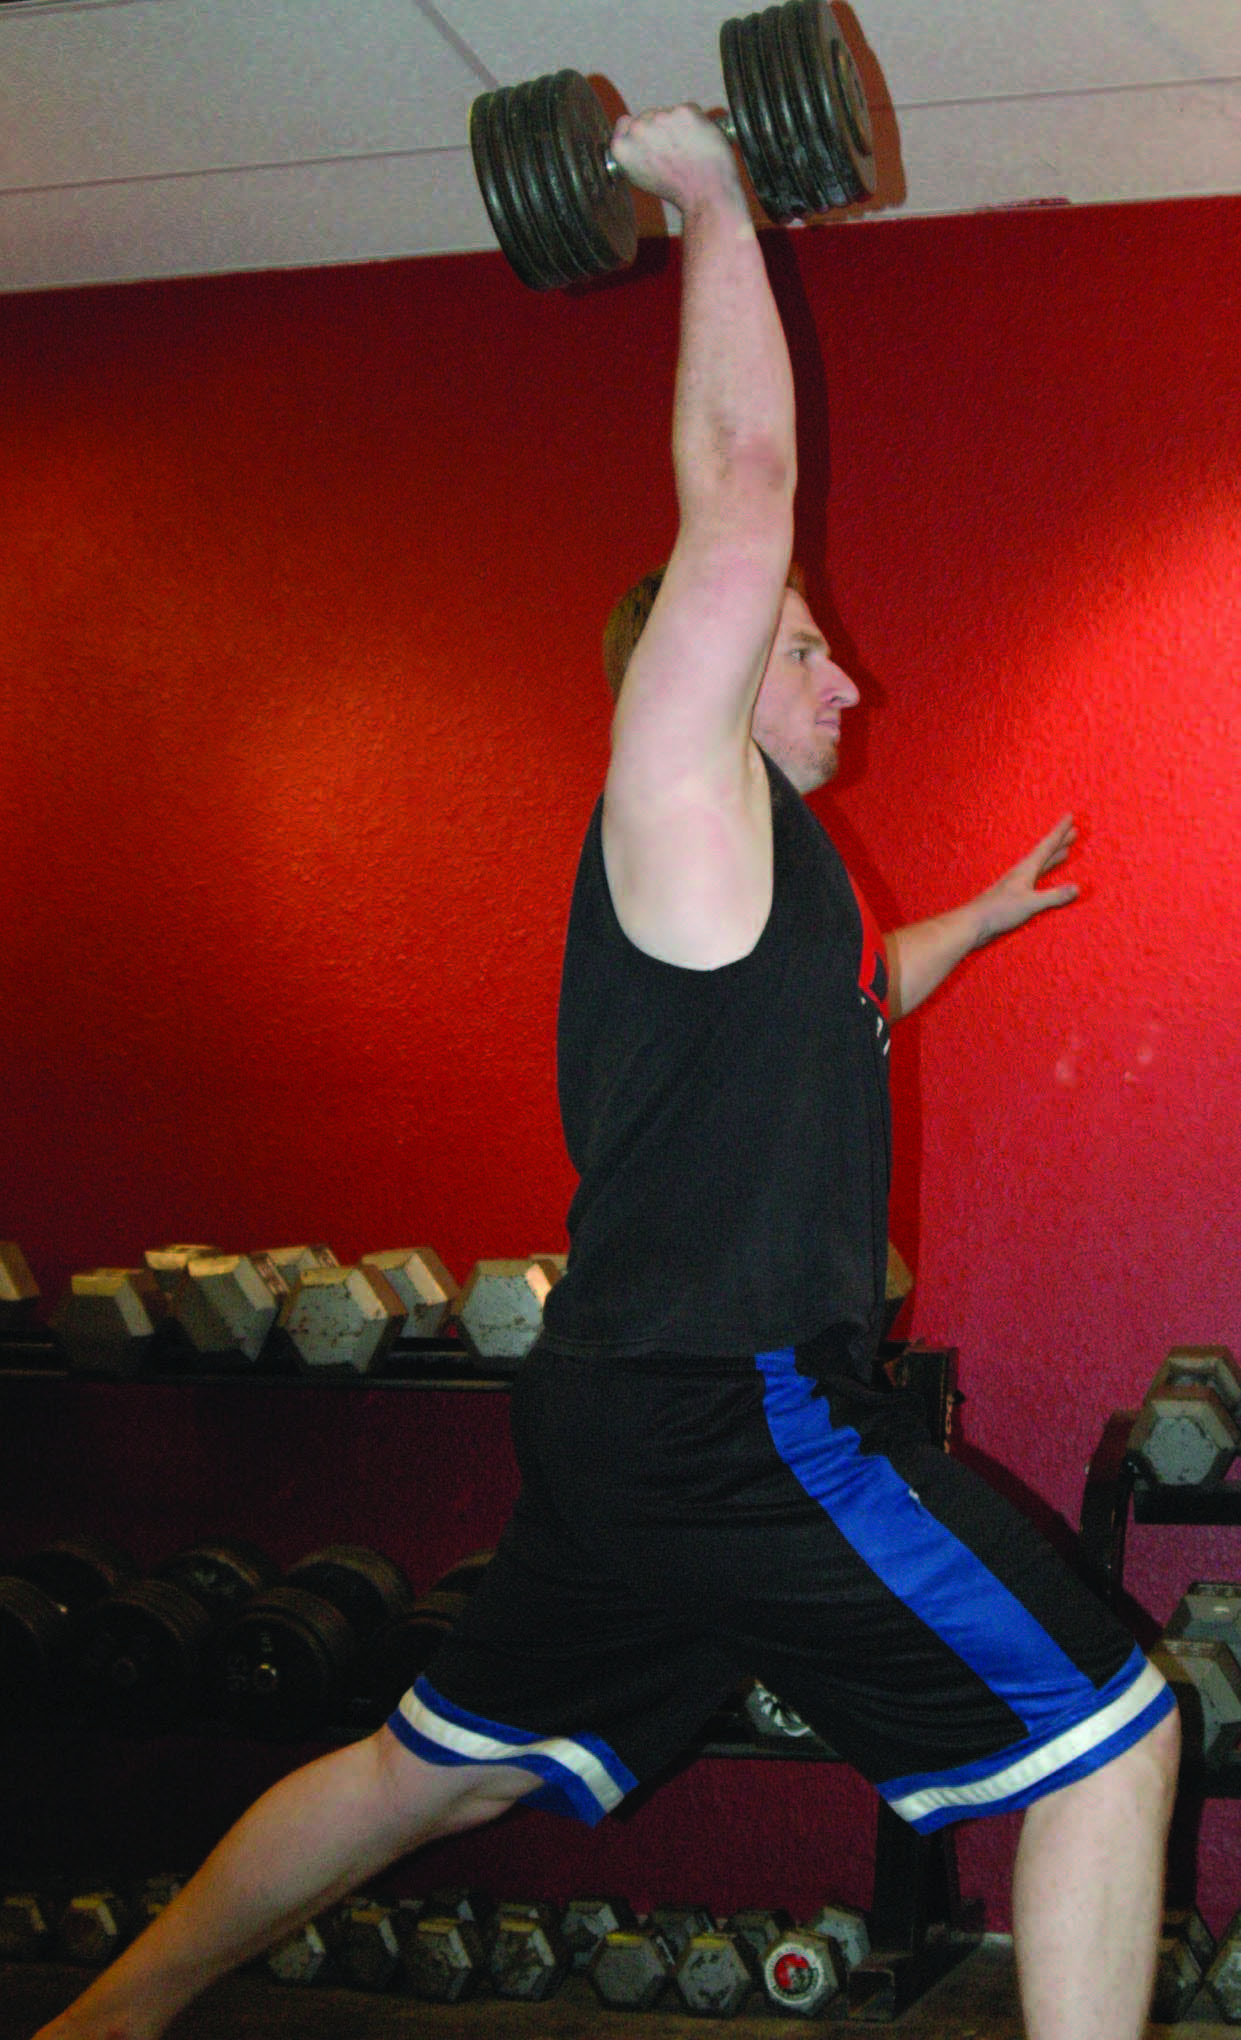
Dumbbell jerk (with thick handle)
Although this move can be done with two dumbbells, we will concentrate on the single- arm version. In the beginning, the athlete should be introduced to a normal dumbbell jerk, sans thick handle. Once they have mastered the jerk, introduce a thick handle. Not only does it increase the grip challenge, but it also demands higher regulation of balance and coordination.
A thick-handle dumbbell can be made out of a length of 2” galvanized steel piping, with hex key collars attached. It is inexpensive and easy to make. There are also various bar attachments you can snap on to dumbbell/barbell handles, if you don’t have the tools to make one.
For the dumbbell jerk, athletes can use either a split or push jerk. Ensure that the weight is challenging enough that the athlete cannot easily press the weight. Clean the weight to a rack position (a high, palm-forward racked position with the bell of the weight resting on the shoulder is commonly used by strongmen and will facilitate a heavy jerk), hinge at the hip, maintaining a strong, locked spine position and drive. Given that this magazine is predominately an Olympic weightlifting periodical, I won’t bore you with the intricacies of the jerk. I will say that elbow lockout and a solid split position are key on the single-arm dumbbell jerk.
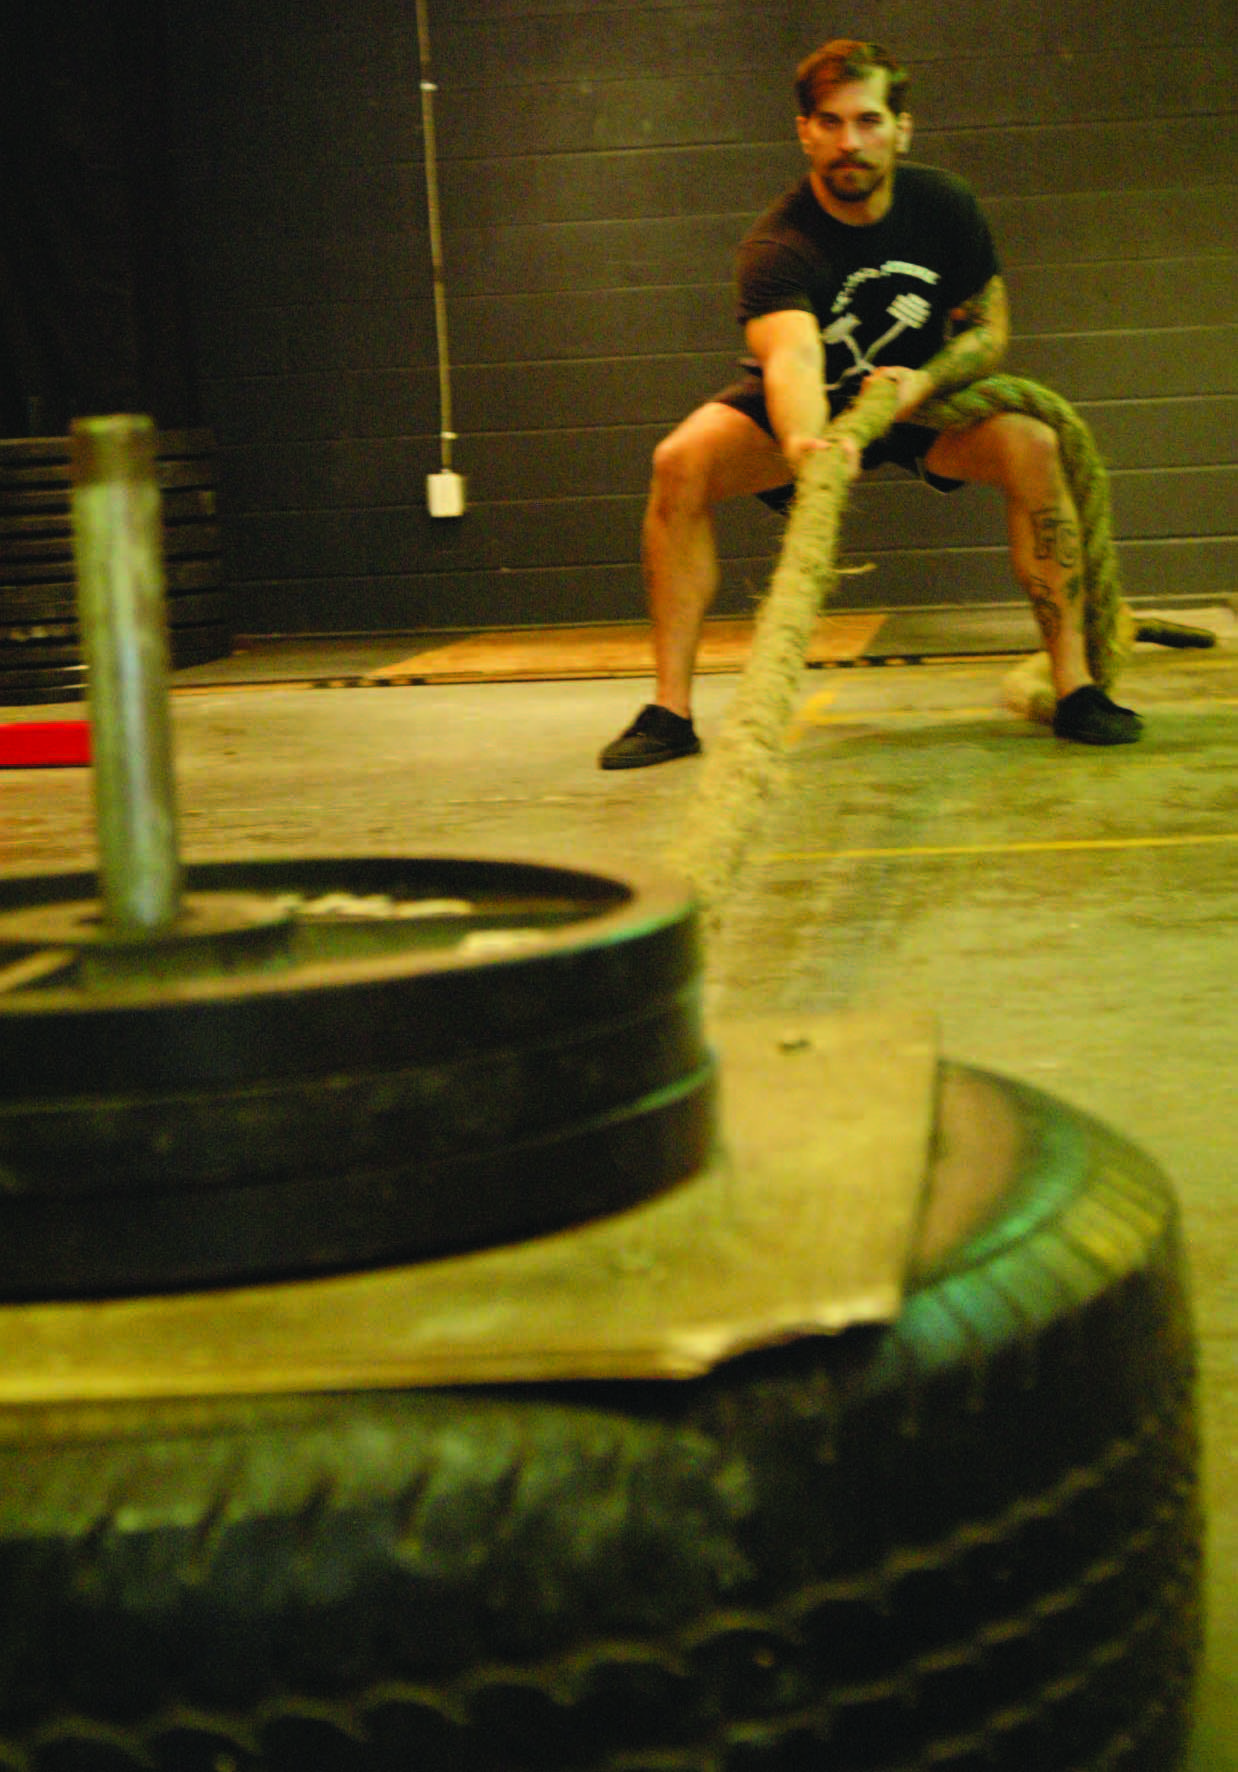
Sled pulls
There are many variations of this movement, but we will focus on a standing row, as it requires the least amount of set-up and equipment.
We’ve found the easiest and most effective way to build a sled is to use semi-truck tires. They range from about 70-100lbs, and can be made into loadable sleds by bolting a square of plywood on top with a length of pipe mounted in the center. Add an eye bolt drilled into the tread on the side of the tire and you’ve got a sled. Weights are simply loaded on to the makeshift platform and you’re off.
We’ve loaded ours with up to around 200lbs of weights, which brings the sled total to around 270lbs. If you need more than that, try a tractor tire (mentioned above). We talk about it, but have never tried. The rubber of the tire creates more friction than a metal sled, increasing the difficulty of the pull without adding a lot of weight, and is quieter, to boot. If you have access to a length of rope with a climbing attachment, snap a carabineer on and link it to your tire’s eye bolt. If you don’t have a rope, dragging straps can be looped to create makeshift ropes. Thick rope is, of course, more challenging, but anything you can grab and pull will do the trick. The shorter the rope, the more times you’ll have to reset, so try to find something at least twenty feet long.
When pulling, assume a solid, shoulder-width stance with hips and shoulders square to the sled. Begin in a squat position with a tight, arched spine (no rounded back here!), and pull hand-over-hand. There are two main styles of pulling here: a strict, hand-over-hand row from a static squat position; and a row that uses hip extension (driving the hips forward as you pull). Both are valid, though athletes will likely make an unconscious shift to the latter pull when they are pulling heavy weight.
So How Am I Supposed to Use this Stuff?
Now that we’ve got a handful of movements, let’s look at how to throw them together into a fun little workout, though not without one caveat: I highly recommend perfecting these exercises individually before combining them into a workout, and establishing working weights.
Around these parts we have a workout we call the “Strongman Medley” comprised of five movements (usually the ones listed above) done for reps and time. For simplicity’s sake, I’ll give you the most basic version: take each of the above-listed movements and perform them all for one minute each. That’s five minutes of work, no rest in between movements, outside of transition and set-up time. Here’s the thing, though: you have to go heavy, hence the importance of establishing your working weights beforehand and familiarizing yourself with the intricacies of each movement. How many times can you flip that tire in a minute? See how far you can get in the farmer’s walk – don’t forget that turning around is hard! How many times can you load the stone/sandbag on to a waist-high platform in 60 seconds? How many jerks per arm (don’t forget to switch arms)? End it with a sled pull – as far as you can in that final minute. If you can stand up after you finish, rest and try it again!
Here are some moves you can implement without too much work, set up or cost.
Tractor tire flips
These are so common now that you can see tires in “mainstream” gyms. If you’ve access to a truck, these are easy and cheap (read: free) to obtain. Stop by your local tire shop and they’ll have stacks and stacks in the back that they’ll be glad to get rid of.
As a general rule, you’ll be able to flip a tire about 150-200lbs heavier than your 1RM deadlift, so look for something in that range. When looking for a tire, consider its secondary uses, such as jump-ups and sledge hammer hits. The diameter and depth of the tire can have an impact on these usages, as well as the difficulty of actually flipping the tire. The amount of tread on the tire can also affect its ease of use – certain tires can sit almost flush to the ground, making them difficult or nearly impossible to flip. Look for a tire with deeper tread – something that you can easily get your hands under when it is sitting flat.
Although athletes should be well versed in the traditional deadlift before they attempt tire flips, it does require a slightly different technique. Set up in an angled position (about 45Ëš), arms flush against the side of the tire (chin and chest may be in contact with the tire, depending on its height), hands set roughly shoulder width apart under the tire and elbows locked. Drive into the tire, pushing forward as you lift. You may need to wedge your knee under the tire to support it as you flip, depending on the weight of the tire. Once you reach full hip extension, switch your grip into a press position and push the tire over.
Farmer’s Walk
This is a valuable movement for the development of spinal strength, postural reinforcement and grip strength. It doesn’t take much to build a set of solid, Olympic plate-sized handles, but kettlebells, dumbbells or even barbells can do the trick just fine.
Most athletes will be able to carry a much heavier weight than they expect. As with the tire flip, begin with a solid foundation in the deadlift/posterior chain movements, and only add in the farmer’s walk when the athlete has sufficient spinal awareness to lift the weight safely. The amount of weight should be challenging (something the athlete can deadlift from the “suitcase” stance for only a few reps).
Once the weight is off the ground, the athlete should assume solid, upright posture with scapula retracted, arms straight at sides and eyes forward. A common postural distortion here is excessive forward thrust of the head – a position created by too much anterior shoulder rotation. Correct by pulling the shoulders back and down and controlling the weight, resisting the impulse to allow momentum to carry the weight forward. This can be done for distance or time, but remember: turning around is significantly more difficult than forward movement. Try to find a long, straight pathway that does not require much deviation in the path of travel or many turnarounds.
Stone lift/carry
This is one of my favorite movements, though most stones you’ll find are in the 300-500lb range, and therefore usually left to high-level strongmen. With the rise in strongman-style training, there are actually a wide variety of stone sizes available, and molds for weights as light as 80lbs. Any stone can work, however, though I would recommend finding something smooth and fairly uniform in size/thickness/etc. If a suitable stone cannot be found (or if you simply do not want a stone in your facility), a heavy sandbag will do just fine.
The introductory move will be a simple lift: begin with the stone/bag between your feet, assume a low squat position, grip far side of the object and lift. Most competitive strongmen utilize a hips-first, rounded-back lift style, but this should only be done with proper training and posterior chain strength. Athletes can use the stone lift for max weight single lifts, or reps for time (amongst other options). The object can be loaded on to a platform (the higher, the harder), shouldered, or lifted and carried.
Dumbbell jerk (with thick handle)
Although this move can be done with two dumbbells, we will concentrate on the single- arm version. In the beginning, the athlete should be introduced to a normal dumbbell jerk, sans thick handle. Once they have mastered the jerk, introduce a thick handle. Not only does it increase the grip challenge, but it also demands higher regulation of balance and coordination.
A thick-handle dumbbell can be made out of a length of 2” galvanized steel piping, with hex key collars attached. It is inexpensive and easy to make. There are also various bar attachments you can snap on to dumbbell/barbell handles, if you don’t have the tools to make one.
For the dumbbell jerk, athletes can use either a split or push jerk. Ensure that the weight is challenging enough that the athlete cannot easily press the weight. Clean the weight to a rack position (a high, palm-forward racked position with the bell of the weight resting on the shoulder is commonly used by strongmen and will facilitate a heavy jerk), hinge at the hip, maintaining a strong, locked spine position and drive. Given that this magazine is predominately an Olympic weightlifting periodical, I won’t bore you with the intricacies of the jerk. I will say that elbow lockout and a solid split position are key on the single-arm dumbbell jerk.
Sled pulls
There are many variations of this movement, but we will focus on a standing row, as it requires the least amount of set-up and equipment.
We’ve found the easiest and most effective way to build a sled is to use semi-truck tires. They range from about 70-100lbs, and can be made into loadable sleds by bolting a square of plywood on top with a length of pipe mounted in the center. Add an eye bolt drilled into the tread on the side of the tire and you’ve got a sled. Weights are simply loaded on to the makeshift platform and you’re off.
We’ve loaded ours with up to around 200lbs of weights, which brings the sled total to around 270lbs. If you need more than that, try a tractor tire (mentioned above). We talk about it, but have never tried. The rubber of the tire creates more friction than a metal sled, increasing the difficulty of the pull without adding a lot of weight, and is quieter, to boot. If you have access to a length of rope with a climbing attachment, snap a carabineer on and link it to your tire’s eye bolt. If you don’t have a rope, dragging straps can be looped to create makeshift ropes. Thick rope is, of course, more challenging, but anything you can grab and pull will do the trick. The shorter the rope, the more times you’ll have to reset, so try to find something at least twenty feet long.
When pulling, assume a solid, shoulder-width stance with hips and shoulders square to the sled. Begin in a squat position with a tight, arched spine (no rounded back here!), and pull hand-over-hand. There are two main styles of pulling here: a strict, hand-over-hand row from a static squat position; and a row that uses hip extension (driving the hips forward as you pull). Both are valid, though athletes will likely make an unconscious shift to the latter pull when they are pulling heavy weight.
So How Am I Supposed to Use this Stuff?
Now that we’ve got a handful of movements, let’s look at how to throw them together into a fun little workout, though not without one caveat: I highly recommend perfecting these exercises individually before combining them into a workout, and establishing working weights.
Around these parts we have a workout we call the “Strongman Medley” comprised of five movements (usually the ones listed above) done for reps and time. For simplicity’s sake, I’ll give you the most basic version: take each of the above-listed movements and perform them all for one minute each. That’s five minutes of work, no rest in between movements, outside of transition and set-up time. Here’s the thing, though: you have to go heavy, hence the importance of establishing your working weights beforehand and familiarizing yourself with the intricacies of each movement. How many times can you flip that tire in a minute? See how far you can get in the farmer’s walk – don’t forget that turning around is hard! How many times can you load the stone/sandbag on to a waist-high platform in 60 seconds? How many jerks per arm (don’t forget to switch arms)? End it with a sled pull – as far as you can in that final minute. If you can stand up after you finish, rest and try it again!
|
Tyler Welch currently lives and teaches at Rock Jungle Fitness in Edmonton, AB. A bit of a fitness nomad, he's lived here and there, and studied a bit of this and that. He has more certifications and associations with more organizations that he might like to admit, but he has a deep and abiding love for strongman/woman work, Olympic weightlifting, powerlifting and weird bodyweight movements. You can find him online at secondnaturefitness.tumblr.com, though his wife and daughter don't give him enough free time to update as much as he probably should. |
Search Articles
Article Categories
Sort by Author
Sort by Issue & Date
Article Categories
Sort by Author
Sort by Issue & Date