

Introducing Plyometrics to the Novice Olympic Lifter
Olympic lifting is a sport in which explosive power and force production is key. In a sport where power production is so important, teaching new lifters to be powerful can be a tough thing to do, especially for the young Olympic lifter. A method in teaching power production, especially for the new lifter, is the introduction of plyometrics.
Plyometrics are movements or activities that enable a muscle to reach maximal force in the shortest time possible. There are three major components when looking at a plyometric movement:
1. Eccentric phase – the preloading phase in which the muscles store energy. The beginning position of this phase also resembles the landing position as well. This is also important because when the athlete gets into repeated jumps this phase needs to be done rapidly.
2. Amortization phase – the transition from the eccentric phase to the concentric phase. This phase is the most important as the quicker that we get through this phase the better force production and power we have.
3. Concentric phase – the actual jump. This is the body’s response to the first two phases. The body will either use the energy provided and make the jump or dissipate that energy into heat.
With the sequences above in teaching plyometrics, we have to start with the ending first. The landing is probably the most important thing you can teach anyone new to jumping. This is because no one ever gets hurt jumping; they get hurt with improper landing. To learn how to absorb force, there are some coaching cues that need to be addressed.
Teaching how to land:
• Hold the landing for two seconds. This allows the coach to see if the athlete can actually absorb the force and to check their ankle, knee and hip position.
• Good posture. Keeping the chest up and out is vital to a good landing and making sure that there are no big issues with the back alignment.
• Feet shoulder width apart. We do not want to see the athlete’s feet inside shoulder width because of the force it puts on the knee joint.
• No hips sink when landing. Once you land, stick the landing, which is also called being stiff. Becoming a stiffer athlete is beneficial to force absorption and prevention of injury. But in reference to no hips sinking, in the two-second hold, you can definitely see if there is hip drop.
• Soft landing (don’t put a hole in the box). We want to be able to control the force of the landing, especially in the beginning phase of jump training.
Once an athlete learns how to land, he or she can go on to work on force production. For Olympic lifters, teaching hip drive is crucial in throwing up big numbers in lifts. We can correlate the jump position to the power position in Olympic lifting. While the power position is important for the lifter, the pre-loading position is important to teach effective jumping. While Olympic lifting elicits more power production, novice or beginner lifters will benefit more from plyometric training because while learning the Olympic movements and really mastering the power position and certain pulls, plyometrics can help teach the athletes to generate power.
The same rule applies for jumping when talking power production. Here are some parallels from Olympic lifting to plyometric training.
These parallels explain why plyometrics can be useful into teaching power production in an Olympic lifting program. Although there is way more to it than the cues above, this begins to show that there is a great comparison into certain cues and goals of both movements.
While those are the basic cues for simple jumps, you have to program correctly to elicit results over a longer period of time. For example, going right to max jumps on a box is setting the athlete up for injury or failure. Proper progression is needed in order to gain the results in the big picture. The progressions listed below are a way to progress correctly and safely to bigger and explosive jumps, while decreasing risk of injury. These movements are done in a two to three week block, progressing each week the new jumping mechanics listed below.
• Non-counter movement: No repeated hurdle jump or box jumping. Jump once, land and stick correctly then move on to the next jump.
• Jump with a mini bounce: An example of this is jumping over a hurdle, mini hop and jump over the next hurdle. This is a great transition from non-counter to the next phase of counter movement jumping. This ability to use the mini bounce helps teach the body to load and reload muscles and energy.
• Jump with counter movement: This is your repeated hurdle jump or what we call true plyometrics, the ability to jump and load that energy quickly and efficiently for the next jump.
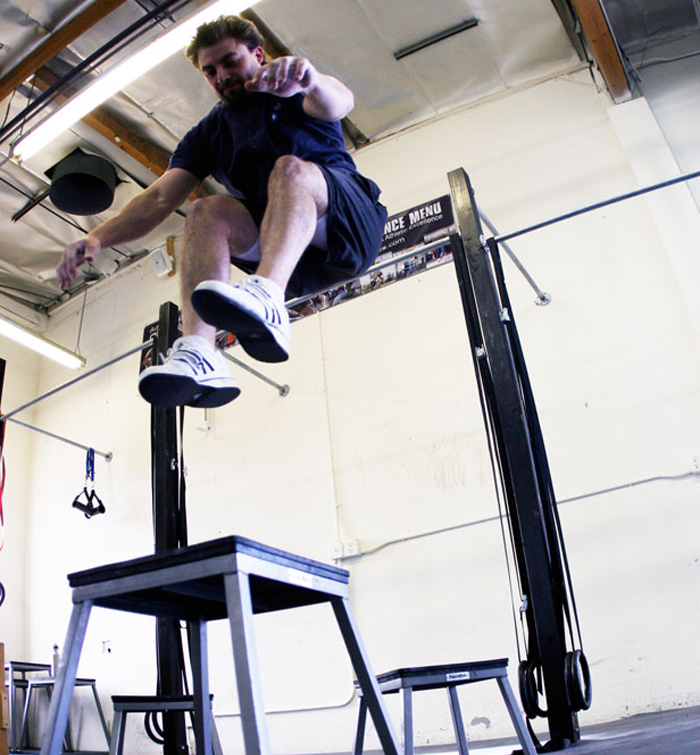
• Advanced movements: Advanced movements like depth jumps are a key in taking your lifts to the next level when you’re ready. Another advanced jump is a concentric jump where you sit on a box and jump to a higher box. This is pure power development because there is no loading on the body.
The next question is where do we put these movements in our training for novice athletes? Well, depending on your athlete’s ability to lift, which at the beginning will be more technique based, I suggest putting them in at the beginning of the program for their power work and then teaching technique post jump training. This will allow the body to learn to produce power. As your athlete advances out on the platform, you decrease the volume of jumping and move on to other protocols for plyometrics.
Setting up the program for a novice lifter has to be constructed with landing mechanics in mind. As mentioned above, landing is crucial to moving into generating more power both on the platform and also with regard to jump training. When looking at new athletes and even older athletes, the incorporation of corrective movements or a stretch in between is important. For our correctives, I tend to lean toward the Functional Movement Screen Correctives. These are selected after we screen them for any mobility or stability issues. With our Olympic lifters, we can also include shoulder flexibility as well.
With regard to core movements, we want to introduce them to stabilizing movements such as planks, side planks, anti-rotation and other exercises that improve that strength. Because they are Olympic lifters, we do not have to worry so much on rotational strength as we would with a baseball or football player. Olympic athletes are very strong and explosive and we do not want to crush the central nervous system and compromise their lifting.
A typical program for a novice athlete will look like this in teaching the landing, generally taking about one to two weeks for most athletes depending on age. You will then move in the order mentioned above with regards to the non-counter movements, jumps with a mini bounce, jumps with counter movements and then finally more advanced movements. These phases can last anywhere between two and four weeks depending on the age of the athletes as well as their movement. You also would only want to include this one to two times a week if lifting four days a week for a novice lifter. If the athlete is on a two to three day lifting program, mix the plyometrics in on just one of those days. For our advanced athletes, we do a plyometric movement every lifting session, depending on sport and a needs analysis (what the athlete is weak in). For example, our baseball pitchers do not Olympic lift. Instead we provide them with a lot of plyometric movements and med ball rotational power movements.
Novice Athlete Landing Program
Weeks One and Two*
A1 - Drop squats 3X5 (standing tall and dropping down to a squat)
A2 – Flexibility work or corrective work (based off of FMS screen - example would be hip flexor stretch off the box)
B1 – Box jumps 3X3 (start at an 18-24 inch box)
B2 – Core exercise (front plank 3X15s)
C1 – Single Leg Hops 3X3 (great for teaching stability and injury prevention)
C2 – Core Exercise (side planks 2X10s)
Once learning has become efficient on landing mechanics, move on to the jumping. Generally see the athlete through two to four weeks and increase in box height if landing is sufficient.
Weeks Three and Four*
A1 – Box jumps 3x4
A2 – Corrective or flexibility (again FMS based, incorporate any weakness you see with mobility or start putting in Olympic lifting stretches, things for forearms or shoulder flexibility)
B1 – Hurdle hops non-counter movement (start with 12 inch hurdles)
B2 – Core exercise (front plank 3x20s)
Plyometrics with a mini bounce. This is done in weeks four to six and is the final stage before the advanced movements begin. Again, check for good landing mechanics and power output.
Weeks Five and Six*
A1 – Box jump with increased height
A2 – Corrective or core movement
B1 – Hurdle hop with mini bounce
B2 – Corrective or core
C1 – Single Leg hurdle hops with mini bounce 3X3 (teaches great control and eccentric strength)
Intermediate training is done when you feel the athlete establishes a great base of power. If the athlete is progressing fast on the platform, check the volume of the jumps and decrease them. The use of other exercises to compliment the power on the Olympic movements can be done with addition of depth jumps and broad jumps.
*Athletes may stay in a phase longer or progress through one quicker if the coach sees that the objective is being met and the athlete can both jump and land correctly.
BONUS! Intermediate: Weeks Seven and Eight
A1 – Box jumps with weighted vest 3X3
A2 – Corrective exercise or core (either a plank movement or shoulder corrective)
B1 – Depth jump to a squat jump 3X3
B2 – Corrective or core exercise (anti-rotation core movement)
C1 – SL hop, no stick or mini bounce
C2 – Core exercise (side plank)
Where do we put this program with regards to their lifting? As previously mentioned we want to do the plyometrics prior to the weightlifting portion of the workout. A sufficient warm up is needed then we can get to the jump training. For an athlete working out four days a week, make sure you have 48 hours of rest in between plyometric workouts. So if you want to hit the jump training on a Monday and Thursday, that would be fine. This allows for proper rest. If you’re only lifting two to three times a week, add the jump training in on one of those training days. Again, making sure you have some rest is ideal.
The above are great guidelines in a novice program and will take four to six weeks to get through. Teaching proper explosive movement not only comes in the form of Olympic lifting, which we train every kid in, but can start with plyometrics and then be weaved into the Olympic setting. Most everyone will want to know what kind of results you will get when going through a jump training program. With a six-week program, you can expect to gain a couple inches in your vertical. With Olympic lifting and plyometrics combined, big lifting numbers are sure to follow.
Plyometrics are movements or activities that enable a muscle to reach maximal force in the shortest time possible. There are three major components when looking at a plyometric movement:
1. Eccentric phase – the preloading phase in which the muscles store energy. The beginning position of this phase also resembles the landing position as well. This is also important because when the athlete gets into repeated jumps this phase needs to be done rapidly.
2. Amortization phase – the transition from the eccentric phase to the concentric phase. This phase is the most important as the quicker that we get through this phase the better force production and power we have.
3. Concentric phase – the actual jump. This is the body’s response to the first two phases. The body will either use the energy provided and make the jump or dissipate that energy into heat.
With the sequences above in teaching plyometrics, we have to start with the ending first. The landing is probably the most important thing you can teach anyone new to jumping. This is because no one ever gets hurt jumping; they get hurt with improper landing. To learn how to absorb force, there are some coaching cues that need to be addressed.
Teaching how to land:
• Hold the landing for two seconds. This allows the coach to see if the athlete can actually absorb the force and to check their ankle, knee and hip position.
• Good posture. Keeping the chest up and out is vital to a good landing and making sure that there are no big issues with the back alignment.
• Feet shoulder width apart. We do not want to see the athlete’s feet inside shoulder width because of the force it puts on the knee joint.
• No hips sink when landing. Once you land, stick the landing, which is also called being stiff. Becoming a stiffer athlete is beneficial to force absorption and prevention of injury. But in reference to no hips sinking, in the two-second hold, you can definitely see if there is hip drop.
• Soft landing (don’t put a hole in the box). We want to be able to control the force of the landing, especially in the beginning phase of jump training.
Once an athlete learns how to land, he or she can go on to work on force production. For Olympic lifters, teaching hip drive is crucial in throwing up big numbers in lifts. We can correlate the jump position to the power position in Olympic lifting. While the power position is important for the lifter, the pre-loading position is important to teach effective jumping. While Olympic lifting elicits more power production, novice or beginner lifters will benefit more from plyometric training because while learning the Olympic movements and really mastering the power position and certain pulls, plyometrics can help teach the athletes to generate power.
The same rule applies for jumping when talking power production. Here are some parallels from Olympic lifting to plyometric training.
| Plyometric Movement |
Olympic Movement |
| 1. Load position | 1. Power Position |
| 2. Punch and drive arms through, start to get extension in the hips | 2. Pull the bar (depending on lift) start driving the hips to extension |
| 3. Get full extension in ankle, knees and hips | 3. Get hips through, start to get under the bar or into catch position |
| 4. Soft but stiff landing. Chest tall arms back | 4. Solid catching mechanics |
These parallels explain why plyometrics can be useful into teaching power production in an Olympic lifting program. Although there is way more to it than the cues above, this begins to show that there is a great comparison into certain cues and goals of both movements.
While those are the basic cues for simple jumps, you have to program correctly to elicit results over a longer period of time. For example, going right to max jumps on a box is setting the athlete up for injury or failure. Proper progression is needed in order to gain the results in the big picture. The progressions listed below are a way to progress correctly and safely to bigger and explosive jumps, while decreasing risk of injury. These movements are done in a two to three week block, progressing each week the new jumping mechanics listed below.
• Non-counter movement: No repeated hurdle jump or box jumping. Jump once, land and stick correctly then move on to the next jump.
• Jump with a mini bounce: An example of this is jumping over a hurdle, mini hop and jump over the next hurdle. This is a great transition from non-counter to the next phase of counter movement jumping. This ability to use the mini bounce helps teach the body to load and reload muscles and energy.
• Jump with counter movement: This is your repeated hurdle jump or what we call true plyometrics, the ability to jump and load that energy quickly and efficiently for the next jump.
• Advanced movements: Advanced movements like depth jumps are a key in taking your lifts to the next level when you’re ready. Another advanced jump is a concentric jump where you sit on a box and jump to a higher box. This is pure power development because there is no loading on the body.
The next question is where do we put these movements in our training for novice athletes? Well, depending on your athlete’s ability to lift, which at the beginning will be more technique based, I suggest putting them in at the beginning of the program for their power work and then teaching technique post jump training. This will allow the body to learn to produce power. As your athlete advances out on the platform, you decrease the volume of jumping and move on to other protocols for plyometrics.
Setting up the program for a novice lifter has to be constructed with landing mechanics in mind. As mentioned above, landing is crucial to moving into generating more power both on the platform and also with regard to jump training. When looking at new athletes and even older athletes, the incorporation of corrective movements or a stretch in between is important. For our correctives, I tend to lean toward the Functional Movement Screen Correctives. These are selected after we screen them for any mobility or stability issues. With our Olympic lifters, we can also include shoulder flexibility as well.
With regard to core movements, we want to introduce them to stabilizing movements such as planks, side planks, anti-rotation and other exercises that improve that strength. Because they are Olympic lifters, we do not have to worry so much on rotational strength as we would with a baseball or football player. Olympic athletes are very strong and explosive and we do not want to crush the central nervous system and compromise their lifting.
A typical program for a novice athlete will look like this in teaching the landing, generally taking about one to two weeks for most athletes depending on age. You will then move in the order mentioned above with regards to the non-counter movements, jumps with a mini bounce, jumps with counter movements and then finally more advanced movements. These phases can last anywhere between two and four weeks depending on the age of the athletes as well as their movement. You also would only want to include this one to two times a week if lifting four days a week for a novice lifter. If the athlete is on a two to three day lifting program, mix the plyometrics in on just one of those days. For our advanced athletes, we do a plyometric movement every lifting session, depending on sport and a needs analysis (what the athlete is weak in). For example, our baseball pitchers do not Olympic lift. Instead we provide them with a lot of plyometric movements and med ball rotational power movements.
Novice Athlete Landing Program
Weeks One and Two*
A1 - Drop squats 3X5 (standing tall and dropping down to a squat)
A2 – Flexibility work or corrective work (based off of FMS screen - example would be hip flexor stretch off the box)
B1 – Box jumps 3X3 (start at an 18-24 inch box)
B2 – Core exercise (front plank 3X15s)
C1 – Single Leg Hops 3X3 (great for teaching stability and injury prevention)
C2 – Core Exercise (side planks 2X10s)
Once learning has become efficient on landing mechanics, move on to the jumping. Generally see the athlete through two to four weeks and increase in box height if landing is sufficient.
Weeks Three and Four*
A1 – Box jumps 3x4
A2 – Corrective or flexibility (again FMS based, incorporate any weakness you see with mobility or start putting in Olympic lifting stretches, things for forearms or shoulder flexibility)
B1 – Hurdle hops non-counter movement (start with 12 inch hurdles)
B2 – Core exercise (front plank 3x20s)
Plyometrics with a mini bounce. This is done in weeks four to six and is the final stage before the advanced movements begin. Again, check for good landing mechanics and power output.
Weeks Five and Six*
A1 – Box jump with increased height
A2 – Corrective or core movement
B1 – Hurdle hop with mini bounce
B2 – Corrective or core
C1 – Single Leg hurdle hops with mini bounce 3X3 (teaches great control and eccentric strength)
Intermediate training is done when you feel the athlete establishes a great base of power. If the athlete is progressing fast on the platform, check the volume of the jumps and decrease them. The use of other exercises to compliment the power on the Olympic movements can be done with addition of depth jumps and broad jumps.
*Athletes may stay in a phase longer or progress through one quicker if the coach sees that the objective is being met and the athlete can both jump and land correctly.
BONUS! Intermediate: Weeks Seven and Eight
A1 – Box jumps with weighted vest 3X3
A2 – Corrective exercise or core (either a plank movement or shoulder corrective)
B1 – Depth jump to a squat jump 3X3
B2 – Corrective or core exercise (anti-rotation core movement)
C1 – SL hop, no stick or mini bounce
C2 – Core exercise (side plank)
Where do we put this program with regards to their lifting? As previously mentioned we want to do the plyometrics prior to the weightlifting portion of the workout. A sufficient warm up is needed then we can get to the jump training. For an athlete working out four days a week, make sure you have 48 hours of rest in between plyometric workouts. So if you want to hit the jump training on a Monday and Thursday, that would be fine. This allows for proper rest. If you’re only lifting two to three times a week, add the jump training in on one of those training days. Again, making sure you have some rest is ideal.
The above are great guidelines in a novice program and will take four to six weeks to get through. Teaching proper explosive movement not only comes in the form of Olympic lifting, which we train every kid in, but can start with plyometrics and then be weaved into the Olympic setting. Most everyone will want to know what kind of results you will get when going through a jump training program. With a six-week program, you can expect to gain a couple inches in your vertical. With Olympic lifting and plyometrics combined, big lifting numbers are sure to follow.
|
Brad Leshinske is the Sports Performance Director for DeLuca’s Sports Performance. He attended North Park University, where he earned a degree in Exercise Science and played football. Brad owned and operated Athletic Edge Sports Performance in Chicago, which has trained more than 4500 athletes, including NFL and MLB players, since 2008. In addition to running “The Edge,” Brad personally programmed Lewis University offseason workouts for women’s soccer, volleyball, golf, men’s volleyball, swimming and baseball. Lewis University tied or broke win records in every sport under his tutelage, and saw the men’s volleyball team reach the National Final Four in Division 1 volleyball in 2011. Brad has trained 10 NCAA All- Americans, eight state champions and seven consecutive athlete of the year winners in various sports, and over 15 all state athletes. He has published numerous articles on ACL prevention, speed and agility training, and plyometrics. He is also a key contributor to WOD Talk Magazine, where he talks about the science behind the training. He was an adjunct professor for two years, teaching health and human performance at North Park University. |
Search Articles
Article Categories
Sort by Author
Sort by Issue & Date
Article Categories
Sort by Author
Sort by Issue & Date